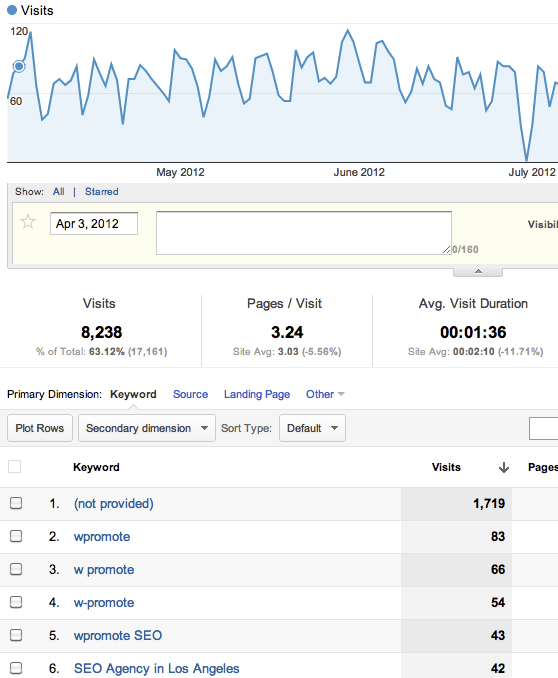
Although Google conceals analytics data on logged-in Google account users, it’s still really simple to get plenty of information on organic traffic going to your site. No big surprise there. However, much of that information isn’t really useful at first glance because it’s often saturated with variations and misspellings of your company’s brand (as seen in the fabricated example below).
Wouldn’t it be nice to view your organic traffic data minus users who were trying to get to your website in the first place? Wouldn’t it be nicer to have this information readily available in Google Analytics each time you were doing keyword research?
Well, it’s all possible thanks to Advanced Segments. In this post, I will show you how to easily set up an advanced segment so you can view your website’s organic, non-branded traffic anytime and with just a couple clicks of your mouse.
Viewing Your Website’s Organic Keywords
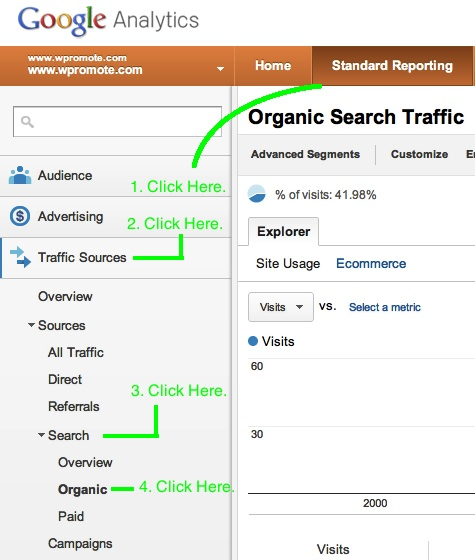
Once you are logged into your Google Analytics account, simply click on the orange Standard Reporting tab to begin the process of pulling your organic analytics data. A navigation bar will appear on the left-hand side.
Select Traffic Sources and click Search, which will open to another set of options, then select Organic. This view will provide you with a list of organic keywords, many of which are branded misspellings or variations of your site.
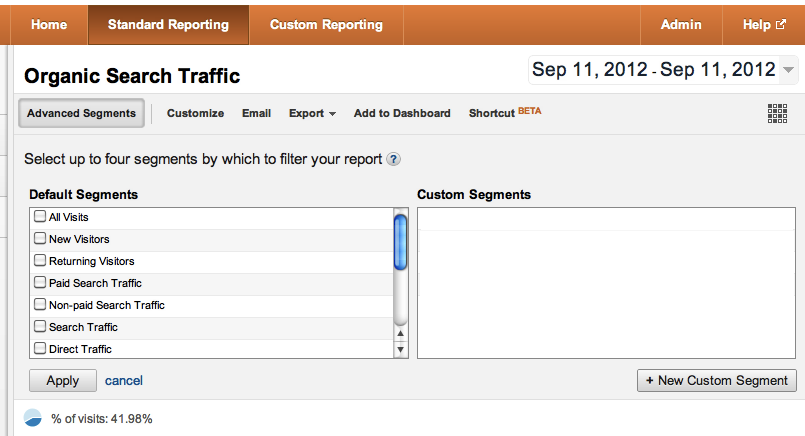
From this view, you will have a new set of options in a sub-navigation bar underneath the orange Standard Reporting tab. Select Advanced Segments and then click the + New Custom Segment button (as seen below).
Customizing Your Advanced Segment
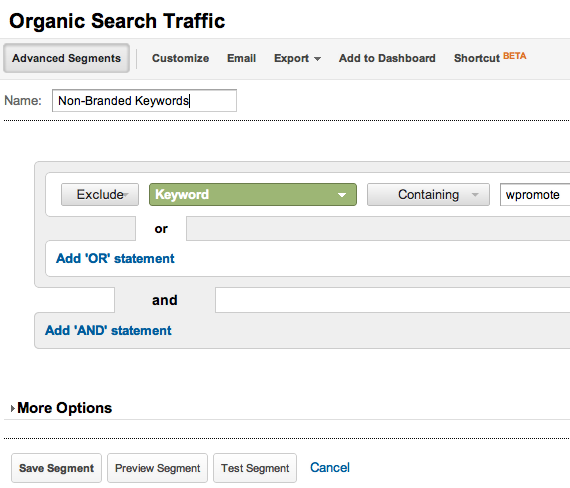
Next, you will see a Name field box with a rule that has four options that you can customize. Make sure to name your advanced segment before making customizations.
Start customizing your options by selecting the Exclude from the first drop-down button. Then, you will want to select Keyword (you will have to scroll down a bit) from the second drop-down button and Containing from the third. In the fourth field, enter the branded keyword variation you want to exclude from your view. Click on the Test Segment button to see if the keyword has been removed from the data.
To add more variations and misspellings to the list of excluded keywords, select Add ‘AND’ statement and repeat the process for a different branded term.
Once you’ve finished, select Save Advanced Segment. The advanced segment will be saved and readily available for easy activation by simply checking the box whenever you are doing keyword research.
Viewing Your Data With Activated Segment
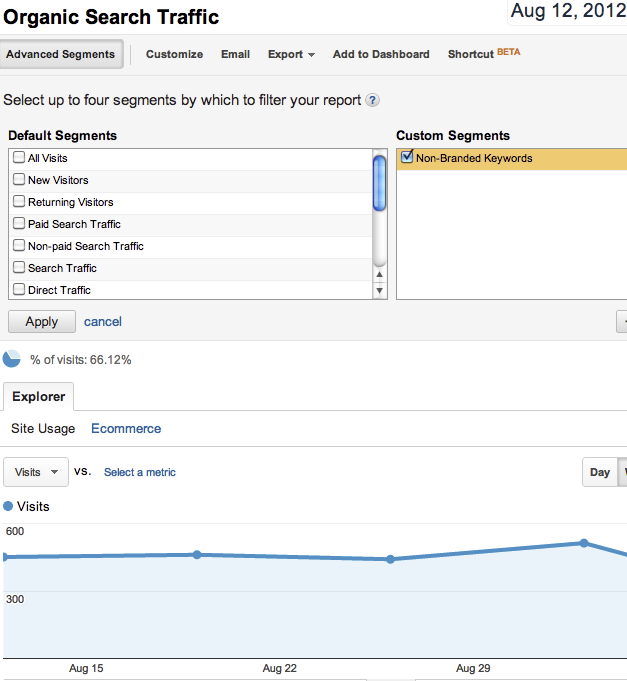
You’ll want to first start this step by accessing your organic keywords as discussed earlier. Then click Advanced Segments and check the custom segment you created. After that, select the APPLY button to view data that no longer contains the excluded branded keywords.
Additionally, you can also look more deeply into the unique metrics of visitors brought to your site on non-branded keywords and compare it to your overall traffic. Pretty nifty stuff, wouldn’t you say?


Responses