
Event Tracking is one of the most powerful features of Google Analytics. It enables you to record the way your users interact with all sorts of elements on your site, including file downloads, button clicks and more.
For most sites, in order to take advantage of this functionality you simply need to have your Google Analytics UA code installed on the page and the ability to add a custom JavaScript method to the HTML element you’d like to track.
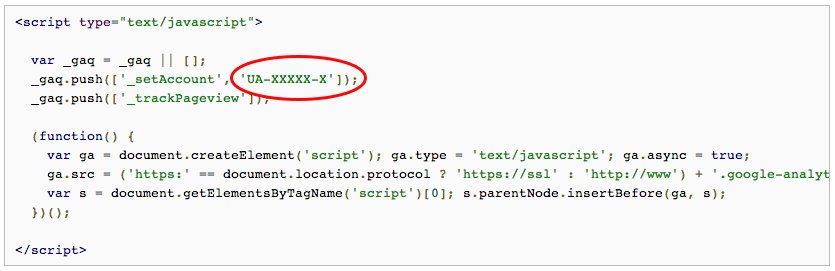
Below is the standard Google Analytics tracking code. Your UA code will be unique to your own Google Analytics Account.
Dissecting The Code:
The below image illustrates the five components that you can track with this feature and what you can accomplish with each of them.
![]()
GA Event Method
Calling this method tells Google Analytics that you’d like to track an event.
- Category: This is the type of event you’d like to track. For example, it could be video or newsletter signup, etc.
- Action: This is describing the specific action you’d like to track. Some examples include downloads, plays or signups.
- Label: Labels are optional. They allow you to further segment your data. For instance, you can track the URL that the event takes place on.
- Value: This optional as well. They allow you to assign a monetary value to the event. If you know the expected ROI from a new lead will be, you can plug it into this variable.
- Interaction: This last step is also optional. It lets you keep track of whether or not a user bounces from your site as a result of the event.
A Working Event Tracking Example:
![]()
Here is what a typical Event Tracking code would look like for tallying how many times someone watches a particular video on your site. As you can see, this code only tracks the category (Video), action (Play) and label (Baby’s First Birthday).
With this information as a starting point, you should be able to set up tracking fairly easily on most websites with only a basic knowledge of HTML.
Not So With Marketo:
We were recently approached by one of our clients, Pertino, for help in setting up custom event tracking for their advertising campaign in support of their new cloud networking app. This campaign consisted of multiple ads all pointing to different landing pages built out in Marketo, each with unique URLs.
For the uninitiated, Marketo is a fairly robust software that allows you to create customizable landing pages and forms with a straightforward WYSIWYG editor. The downside to this product, however, is that you don’t get access to edit the source code of every element on the page – particularly form buttons, which was the item we most wanted to track.
Luckily for us though, Marketo does let you insert custom JavaScript, jQuery and HTML throughout the rest of the page, so we were able to come up with a custom solution that works great!
Step 1 – Determine Your Setup
When setting up any Event Tracking in Google Analytics, the most important thing is to decide how you’d like to categorize your results. For our example, we wanted to track the number of people that downloaded the app, so it follows that a logical category for this would be called, “Downloads”. Keep in mind that if you have multiple downloadable items on your site, then this might not be the best naming convention for you.
Next, since we were then splitting the advertising campaign up into separate landing pages and A/B testing them, it made sense to make our “action” component the specific call to action that we used on that page. It could be “Download Now” or “Try it for free!” or whatever your specific CTA is for your button. On this particular page, we used “Try Pertino”.
Finally, since some CTAs occurred on multiple pages, we tracked the specific URL in the “label” component. Remember that this is an optional step, so you may or may not need it, depending on your goals.
So our code snippet looked like the following:

Step 2 – Locate The ID Of Your Element
Because we didn’t have access to edit the code of the form’s button in Marketo, we had to set up a custom JavaScript solution that targeted the button’s “id”. The id attribute is most often used to point to a style in a style sheet, but you can also use it to manipulate the element in JavaScript.
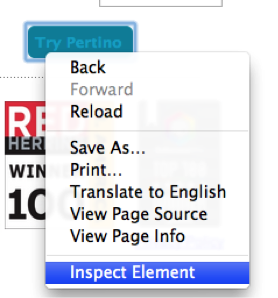
To find the id of any element in HTML, you can use a plugin like Firebug. Once installed, you can use Firebug to inspect any element by simply right clicking on it.
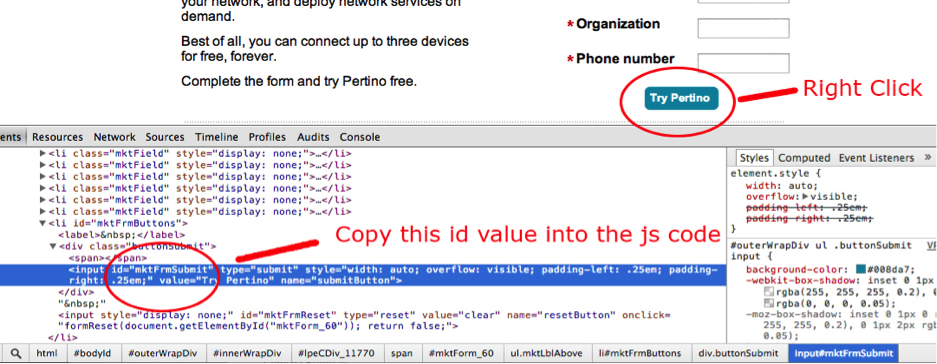
Right click your button and choose “inspect element” to view the source code of that particular item.
In the code of the button, you should be able to find the id of the form fairly easily. In our case it was called “#mktFrmSubmit”. Make a note of this in order to add it to the JavaScript code.
Step 3 – Add The JS To The Marketo Landing Page
Once you have the id of the element you want to track, all that’s left is to add it into the landing page!
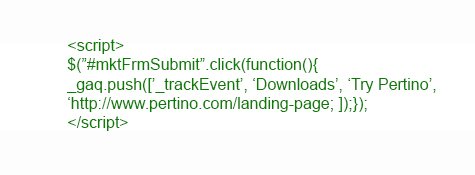
To do this, we need to alter the code slightly from the stock example. We have to make a new function that triggers the event tracking after a click. Since our landing pages utilize jQuery, we used the script below.
If you’d like to use just JavaScript to accomplish this, then your code would look something like:

To put this code into the landing page, you just have to make an HTML box (Note: you have to be logged into Marketo to view this link) and copy/paste the code into it.

Create new HTML box…
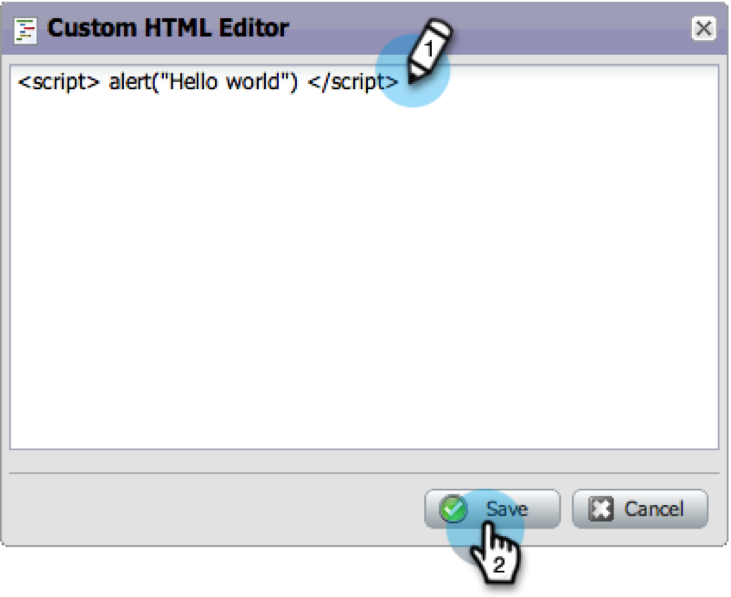
And paste the code into it!
Once the code is entered and the page is published, you will be able to see the events almost instantly with Google Analytics Event Tracking in real time! If you have any questions or tweaks for the setup, please leave a comment below.