Lately, as Wpromote’s lead graphic designer, I’ve gotten a lot of requests from coworkers to teach them how to remove a pimple, wrinkle or under-eye circle in Photoshop. While generally, I don’t like to change someone’s unique and distinguishing features, there are a few easy methods that will make your photo (and your face) shine just a little bit brighter.
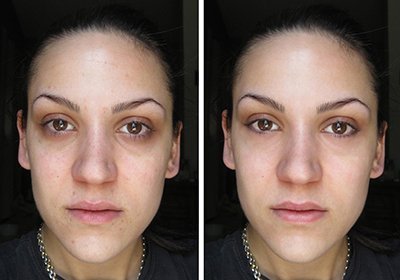
I’m starting with this photo of a woman:
I don’t know her name or who she is but she looks like an Emily to me. She’s got a few issues here: piercing scars, a little acne, some under-eye circles and some fine wrinkles. First things first, duplicate the background layer and work off of the copy. Now let’s get to it!
1. Spot Healing Brush
This tool is awesome for beginners; it’s easy to use and the results are great. Find the tool that looks like a Band-Aid, just make sure it says “Spot Healing Brush Tool” when you hover over it or use the keyboard shortcut J. Adjust the brush size by right-clicking or opening up the panel at the top left of the screen. You will generally want to set your brush about the size of the elements you are removing.
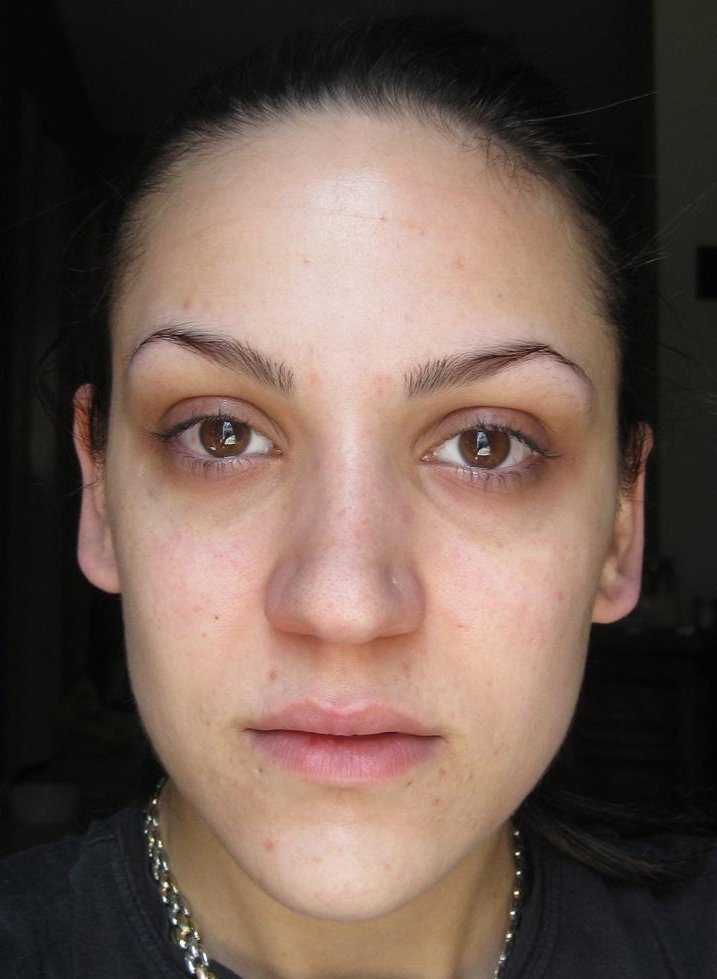
Use the brush to click and paint over your blemishes… yeah, it’s really that easy! If you need to zoom in to see more detail, use the command + and command – shortcuts for zooming. I try not to get too carried away; I like to leave freckles and moles so I don’t change the person’s appearance completely. After you finish healing your pimples… feel free to “heal” any other things that stand out to you. I’m going to go in now and remove those extra eyebrow hairs sprouting up, fine lines and some of the larger pores on her nose with the same method. And like magic, Emily’s face is clear!

2. Dodge Tool
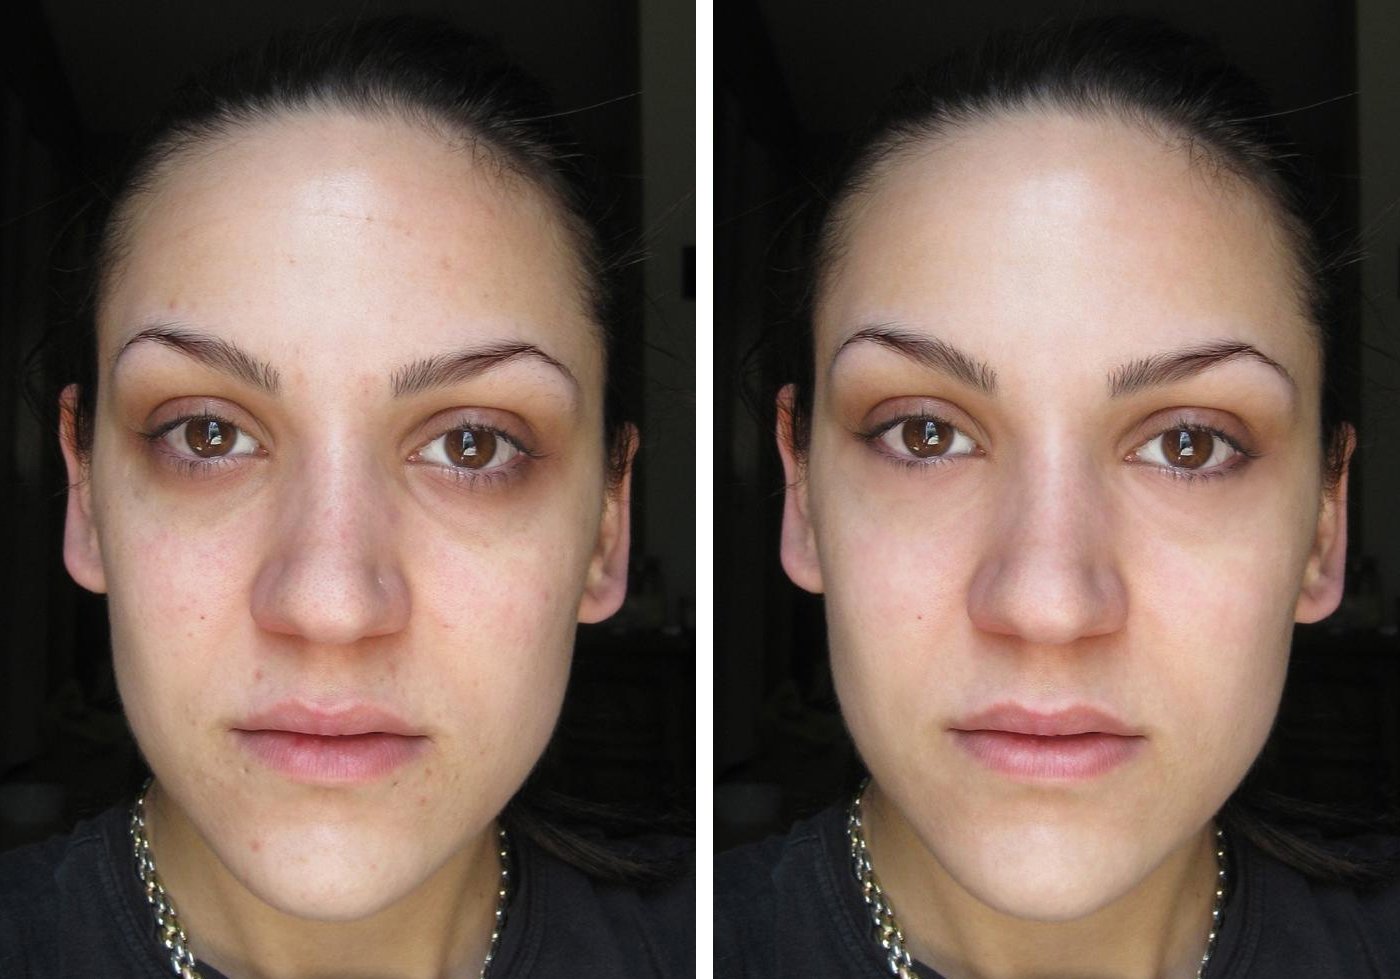
I use this tool to quickly brighten the whites of the eyes and whiten any yellow or discolored teeth. Don’t go overboard (like everything else in this post), or she’ll start looking artificial. Choose the Dodge tool, which is the one that looks kind of like a lollipop. Once you have this selected, make sure to set your Range to Midtones and your Exposure to 10% at the top left of the screen. You can adjust your brush size by right-clicking or changing it using the panel at the top left of the screen as well. Paint over the whites of the eye. Now, Emily has a pretty big brown spot in her eye that the dodge tool couldn’t brighten enough. This is when the Spot Healing Brush comes in handy again. Your photo should now look something like this:

3. Clone Stamp Tool
This tool is a little trickier, but worth it once you see the outcome. Since Emily has some dark circles under her eyes, we’re going to want to lighten these. Select your Clone Stamp Tool – it looks like a hand stamp. Adjust the settings for size (right-click) and you’ll want your brush size close to the size of her pupil, make sure your hardness is somewhere between 20-60% and set your opacity around 10%. Lastly, set the Mode to Lighten. Now it gets a bit tricky. Choose an area on her cheek that has a nice skin tone, hold down option and click on that area. Now move your brush directly up to her under eye and start painting. Repeat with the 2nd eye, now your photo should look something like this:

4. Burn Tool
The burn tool is great for bringing more contrast back into the photo by darkening things that might have gotten too light in the process. I usually like to use it subtly on the lips and eyebrows. Select your burn tool. It is in the same area as the Dodge tool, click on the icon for a second or two and the Burn tool should drop down as an option – it looks like a hand making an “O” shape. Set the Range to Midtones and your Exposure to 10%. Start painting the lips, especially if the lips are not well defined, make sure to get the outlines good. Again, I notice a small blemish on her lip, so I’ll use the Spot Healing Brush to fix it. Do the same burning on her eyebrows until it looks good. I might even go in and darken up her lash line since we lost a little definition when we got rid of the eye circles. After seeing her lips darkened a bit, I decided to go back in with the Dodge tool to bring in a highlight on the lower lip, leaving the image like this:

5. Blur Tool
The blur tool is great for those tiny finishing touches that aren’t necessarily a blemish or wrinkle but have a little more texture than you’d like. Choose the blur tool, which is the one that looks like a little raindrop and make sure your Mode is on Normal and set the Strength to around 20%. Adjust the size of your brush depending on the size of the area you’re working on and start blurring.
There you go! You should have ended up with a natural-looking, retouched photo. She still looks like herself, don’t you think? Feel free to ask any questions in the comment area below or if you have any unique retouching methods feel free to share!