

Now that you understand IP address filters, you need to understand IP address filter ranges.

If you, your digital marketing representatives, or your other business partners frequently check and work on your website, you’ll want to implement IP address filters to filter out the data they generate from your Google Analytics results. That way, the data you see provides you with an accurate understanding of user interactions with your site (number of visits, pages per session ratio, bounce rate, etc.).
One way to do this is by implementing individual IP address filters—yours, your marketing manager’s, maybe that guy you email sometimes for help updating your content. However, if you don’t just have individuals working on your site, but whole companies (maybe in multiple offices), individual IP addresses aren’t going to get the job done because there could be any number of people working on your site.
If this situation applies to you, you will need to implement a CIDR IP address (i.e. an IP address filter range) into your Google Analytics.
What Is A CIDR IP Address?
CIDR stands for Classless Inter-Domain Routing, and it is a format for expressing a range of IP addresses. While an individual IP address would look something like this: 63.60.75.188 (number chosen at random), a CIDR IP address would look something like this: 63.60.75.188.1/26.
The difference is the extra number followed by the slash and more extra numbers. In the above example that would be the .1/26 in 63.60.75.188.1/26. For your knowledge, the smaller the number that follows that slash, the greater the number of individual IP addresses that fall under that range.
Now, unfortunately, Google Analytics will not always accept the CIDR format and will generate an “Invalid IP address” response when you try to implement it in the normal way. If this happens, you will need to determine the IP address filter range in a different way.
Determining Your Range
Determining your IP address filter range will take several steps and require the use of two outside Internet tools. To begin with:
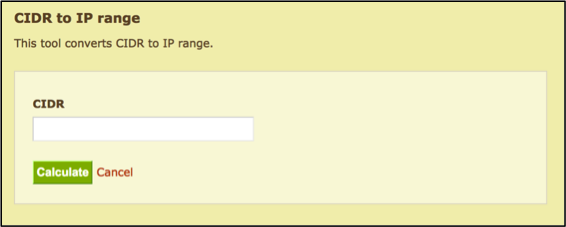
This website allows you to ascertain the actual IP addresses trying to be expressed within that CIDR format. Once you’re on the site, you’ll want to input your CIDR IP address into the available window:
When you hit calculate, you will be provided with the following information regarding your CIDR IP address:
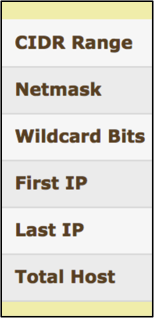
What you’ll want is the First IP and the Last IP. For example, let’s say for 63.60.75.188.1/26 I was given the First IP of 63.60.0.0 and the Last IP of 63.60.75.255. (Again, these are all random theoretical numbers meant to illustrate a point.) Copy these numbers and proceed on to the next website tool:
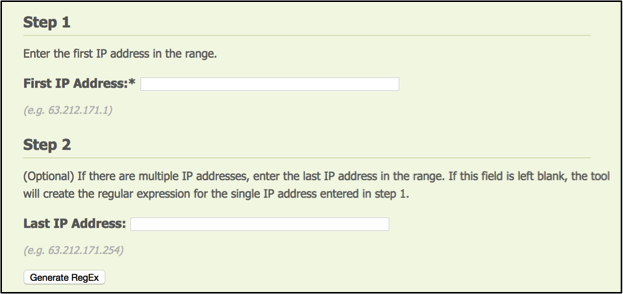
This website allows you to take that IP information you acquired and transform it into a format that Google Analytics will recognize. The format this website tool will produce is called a regular expression or regex.
Once on the site you will want to input your First IP address and Last IP address in the windows provided and then hit “Generate RegEx.”
That will produce a string of numbers and symbols that looks something like this:
^63.(6[1-3]).([0-3]|[1-3][0-3]|1([0-3][0-3])|2([0-4][0-9]|5[0-5])).([0-3]|[1-3][0-3]|1([0-9][0-8])|2([0-4][0-3]|5[0-5]))$
Copy that and save it; it is your new IP address filter range, which has been converted into a nifty IP address filter pattern! Now that you have it, go back to Google Analytics.
Implementing Your IP Address Filter Pattern
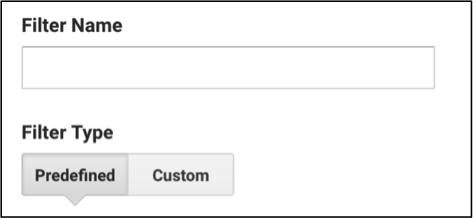
All right, final step. Now that you have returned to Google Analytics, proceed how you normally would for filter implementation. Go to ADMIN and then the View column, select the “Filters” option, and then click the big, red “+ ADD FILTER” button. From here your process changes. After you name your filter, you want to change the “Filter Type” from Predefined to Custom.
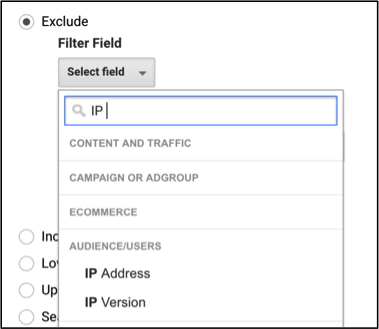
Under the “Filter Field” section that appears, there will be a dropdown you want to select. Search for and select “IP Address” in that dropdown.
Beneath that area, there will be a place for you to enter a filter pattern. So paste in that long string of numbers we just generated and then hit save at the bottom.
Voilà!
Your complete IP address filter range has been implemented in the form of this IP address filter pattern. Now that exceptionally long list of IP addresses you were trying to filter out of your data has been taken care of in one shot vs. a thousand separate individual IP addresses.
In Closing
Like with individual IP addresses, you can input as many IP address filter ranges and filter patterns as you like. Just always make sure you are aware of what data view you are looking at when analyzing your data or reporting on it. We don’t want those filters you worked so hard to implement to go to waste, after all!