So I’m going to go out on a limb here and say that pretty much everyone loves glitter as much as they hate the mess it makes. To have all the fun of glitter in your digital marketing without any of the mess, follow these steps to make an awesome glitter text effect minus any offending sparkles that may linger for ages on end.
Step 1 – Let’s Begin
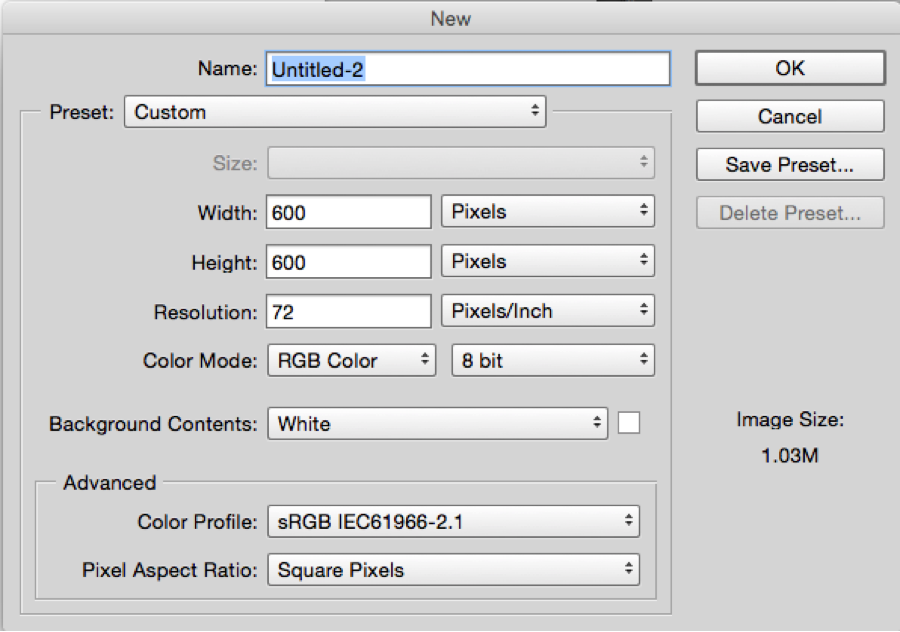
Create a new image in Photoshop (File>New or Command+n). The file size is 600px x 600px at 72 ppi (pixels per inch). Make sure to select RGB as the color mode if you’re using this for the web.
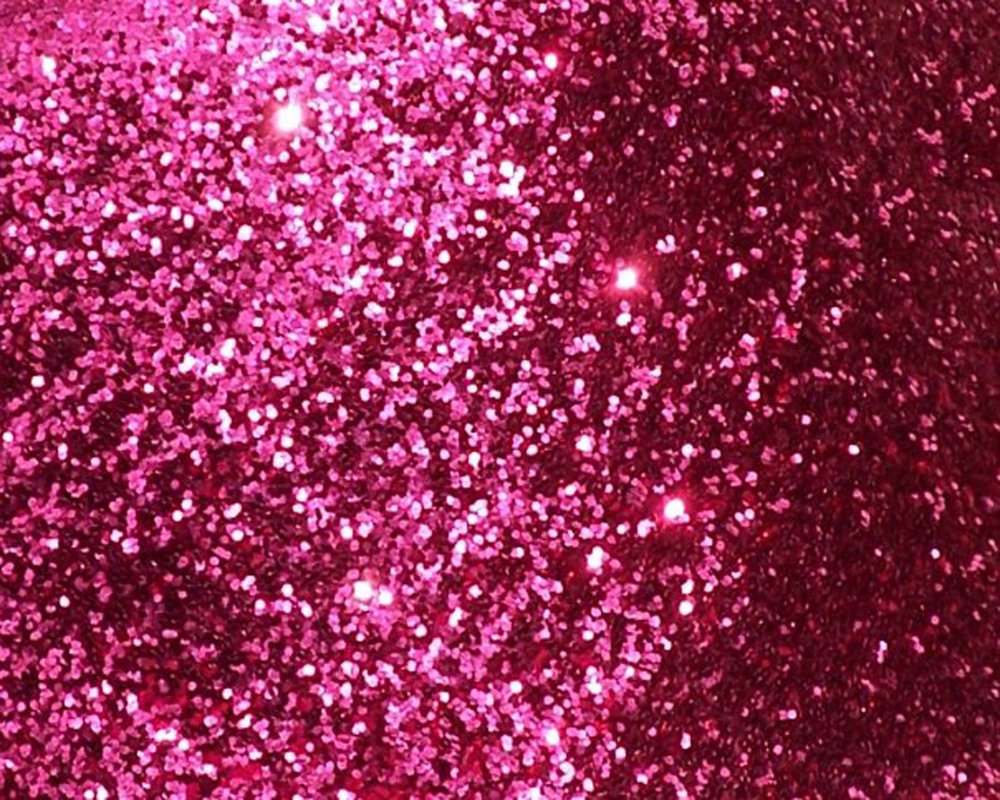
Step 2 – Find A Glitter Stock Image
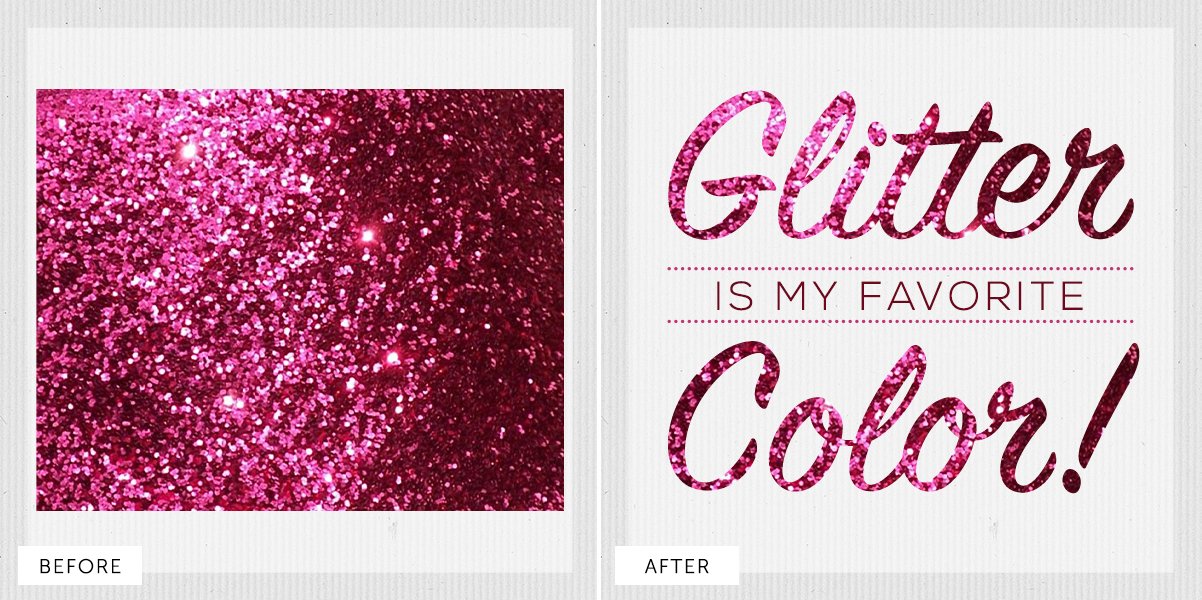
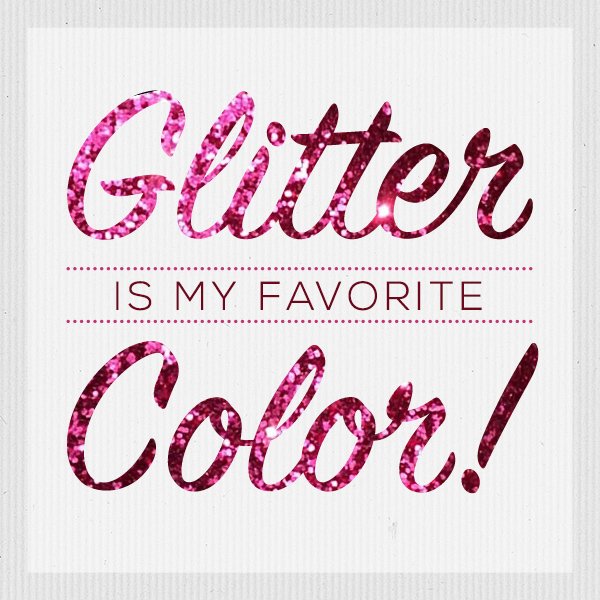
I found a list of 40 great glitter images right here. I’m going with a hot pink glitter because it has great shimmer and gradating tones that will add depth and flow once inserted onto my text.
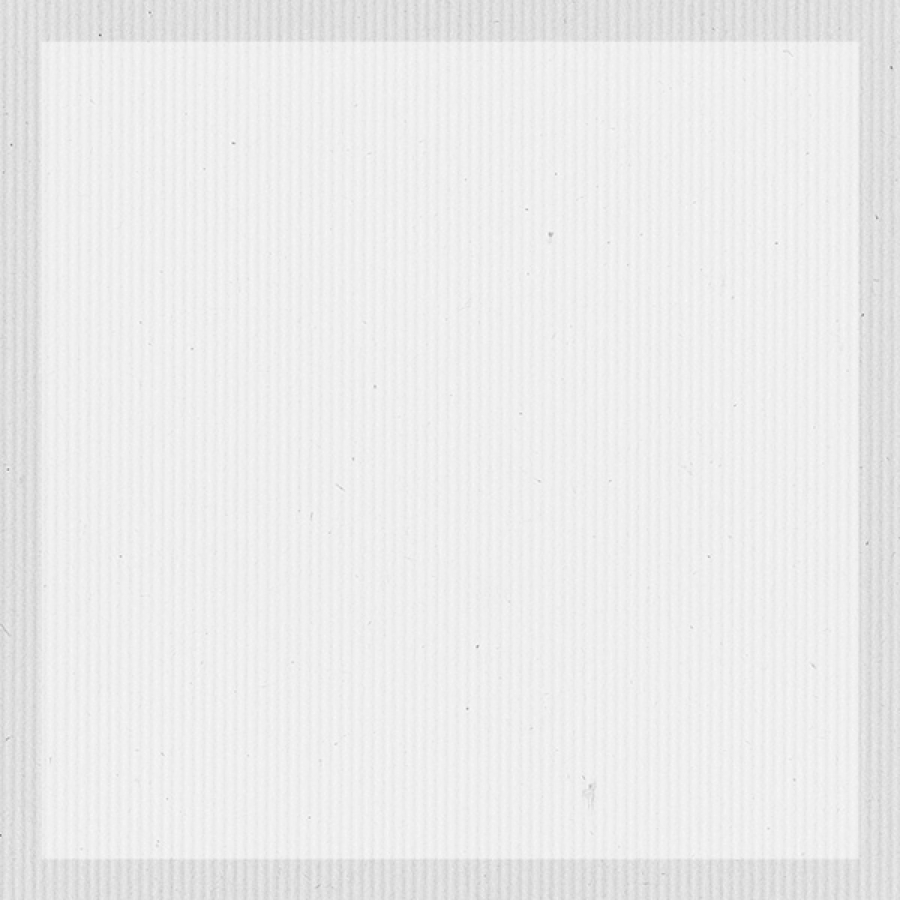
Step 3 – Create Background
I will start by adding a paper background. Here’s a set of 12 free paper textures on Dribbble. Simply drag the image onto the canvas. Then create a square shape smaller than your canvas (545 x 545px) with the rectangle tool (U). Lower the opacity of the square to 50%. You end up with a nice, clean, layered looking background.
Step 4 – Type Out Your Text
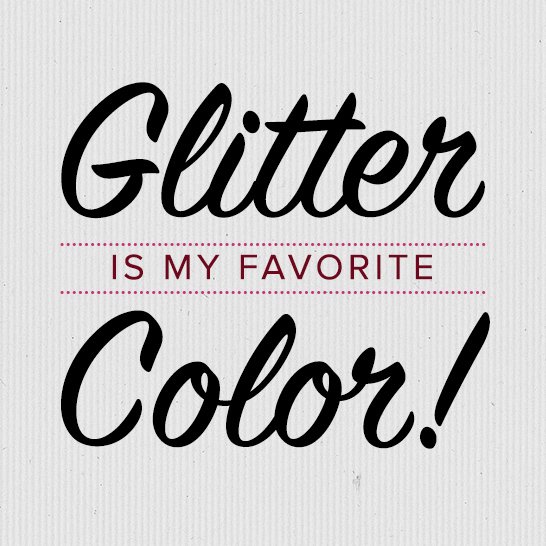
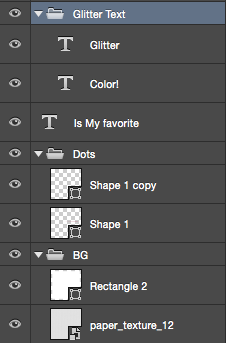
When typing out your text, create a new layer for each word that you want to cover in glitter. For the text I chose I have 3 separate text layers: “Glitter”, “is my favorite”, and “Color!” I used Sign Painter House Script for the script text and Nexa Light (size 40px color #6e071d) for the sans-serif text. I also added dotted lines as ornaments to surround the middle text (using the pen tool for this in shape mode). I recommend using a thick font when creating this effect. Script fonts usually have a nice range of thickness within the letters. This is what your image should look like now:
Group the layers “Glitter” and “Color!” together. These are the 2 text layers that we will be adding glitter to. This is what your layers should look like now:
Step 5 – Add The Glitter (NO MESS INVOLVED)
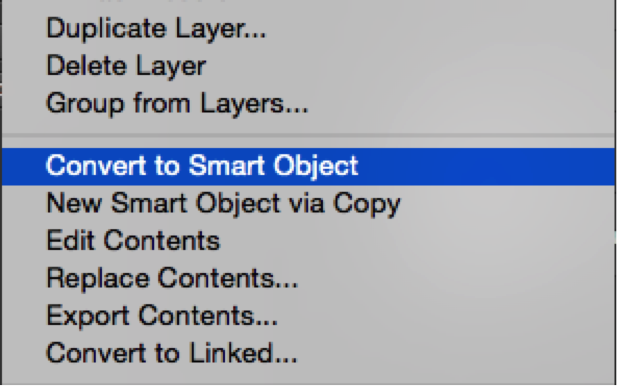
Drag your glitter image onto the Photoshop canvas. I like to convert the image into a smart object so it will not lose quality if the layer is scaled down. To do this, right-click the layer in the layers panel and select “Convert to Smart Object”.
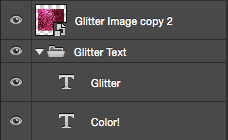
Arrange glitter layer above the text layer you want to be “glitter-fied”.
Step 6 – Add A Clipping Mask
After you’ve arranged your layers, you need to create a clipping mask. To do this you hold option/alt and click in between the glitter image layer and the glitter text group. You will see this icon when you hover in between the layers:

Once you click, the glitter will only show up where there is text within the group.
The awesome thing about clipping masks is that everything is still editable and you won’t have to worry about editing a mask if you need to make a text change.
Step 7 – Adjust Glitter
All that’s left is to adjust the glitter image to fit the text correctly. Move the image around, rotate or scale to find the perfect fit for your text. Congrats, you just made an awesome glitter text effect with ZERO clean up time!
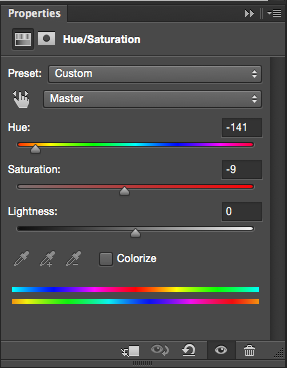
Optional Step – Color Change
So what if your audience HATES hot pink? It’s easy to adjust the Hue/Saturation of the glitter image to a different color. Create a Hue/Adjustment layer found in the bottom of the layer panel (or Layer > New Adjustment Layer> Hue/Saturation). Adjust the levels to find the perfect shade you’re looking for.
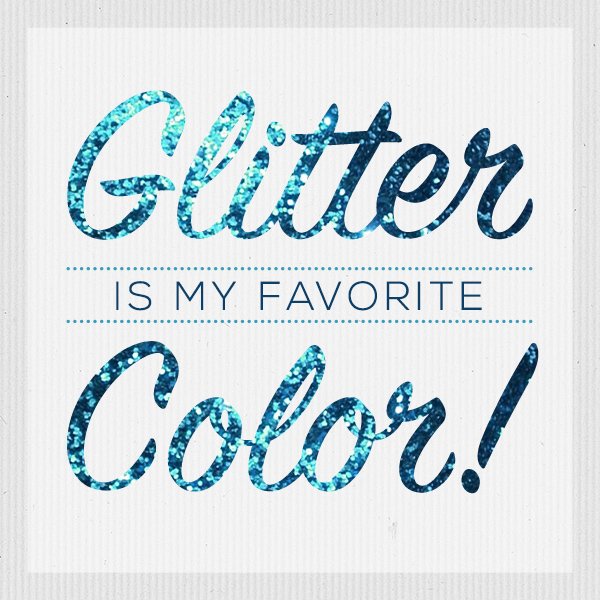
And, voila! There you go!
If you’re ready to learn more cool and immediately actionable digital marketing tips and tricks, head over to the Wpromote University to learn from some of the best minds in the business.